Showing posts with label Baking. Show all posts

Thursday, March 3, 2011

Strawberry Frosting Chocolate Cupcakes

On Saturday we attended a surprise birthday party for our friend Andrea. It was a fun party that ended up looking a lot like a wedding reception with lots of dancing and karaoke. I made some chocolate cupcakes for the party  to go with the blueberry and lemon frosting cupcakes I had made the day before.


As I said before, I've been working on finding a chocolate cupcake recipe that satisfies my deepest chocolatey cravings and I feel a step closer after tweeking my last recipe. I didn't want to get too crazy with the recipe since I was going to be feeding them to a room full of people I didn't know, but I felt fairly certain that my changes would make an awesome cupcake. And I was right. It was very moist and had a more sweet chocolate flavor, where as the previous cupcakes I had made were more of a strong, dark chocolate flavor. It went perfectly with the strawberry frosting, which nicely fulfilled my berry cravings.


I decided that I want to start baking for every event possible and taking my camera everywhere. I want to do everything I can to sharpen my baking and photography skills. So now my friends can expect me to shove a cupcake in their face at every opportunity and then take a picture of them eating it. Sounds fun, right? Everyone wins. 


Chocolate Cupcake Recipe

(makes about 16 cupcakes)


Ingredients:

  • 1 cup steaming hot cappuccino (regular ol' coffee would work too)
  • 1/2 cup cocoa powder
  • 1 1/3 cup all purpose flour
  • 2 teaspoons baking powder
  • 1/2 teaspoon salt
  • 3/4 cup unsalted butter
  • 1 cup white granulated sugar
  • 3 large eggs
  • 2 teaspoons vanilla extract
Directions:
  1. Preheat your oven to 375 degrees F and line your cupcake tray
  2. In a small bowl, pour the hot cappuccino over the cocoa powder and mix thoroughly. Set aside to cool.
  3. In a medium bowl, mix together dry ingredients.
  4. In the bowl of your mixer (or in a large bowl if you don't have a mixer), beat together butter and sugar until fluffy.
  5. Add eggs, on at a time, mixing well after each addition.
  6. Mix in the vanilla extract
  7. Add in the dry ingredients and mix thoroughly.
  8. Add in the cocoa mixture and mix well until smooth.
  9. Fill cupcake tray evenly (each cup about 3/4 full).
  10. Bake for 16-20 minutes, or until toothpick comes out clean.


Strawberry Frosting Recipe
Ingredients:
  • 1/2 cup (1 stick) unsalted butter, softened
  • 3 cups powdered sugar
  • 3 tablespoons  fresh, pureed strawberries (about 3-4 strawberries with tops cut off)
Directions:
  1. Cream butter in the bowl of your mixer or in a medium bowl with a hand mixer
  2. Slowly mix in the powdered sugar
  3. Add in the pureed strawberries, one tablespoon at a time and mix well

    Tuesday, March 1, 2011

    Blueberry Cupcakes with Lemon Frosting

    I happened upon an article on MarthaStewart.com about spring dessert recipes when we had our lovely, too-short-lived warm days a week ago. All I can think about now are cherry pies, peach cobbler, and lemon cake. I want to feel a cool breeze coming through our open windows as flour flies everywhere and I feel right at home in my kitchen with my apron and rolled up jeans. Oh, spring. I miss you so.

    My dear friend Melissa had surgery last week and I wanted to bring her some treats. Since I was just itching for a reason to make something springy and sweet, I decided to make her some blueberry cupcakes with lemon buttercream.


    Lucas said they tasted like heaven. Either he's overly sweet or these cupcakes are divine. My own taste buds are leaning towards divine.


    I iced the cupcakes for Melissa, then refrigerated the icing to frost the rest of the cupcakes later. Unfortunately, while sitting in the fridge, the butter in the icing stiffened up and the lemon juice just sort of separated. So, when I squeezed it out of my icing bag, it was less than pretty. But, as you can see in the pictures, I smoothed out the icing with an offset spatula and it worked out just fine. Plus, it still tasted awesome. That's all that really matters anyway, right?


    We took the leftovers to our friend's surprise birthday party. On the way there we stopped at a grocery store to get more blueberries to top them off. They looked really cute with the berries on top, but I forgot to take a picture of them. Fail. Just take my word. They were stinkin' precious looking. Later this week I'll tell you all about the other cupcake I made for the surprise party:]


    Blueberry Cupcakes Recipe
    Makes about 14 cupcakes

    Ingredients:
    • 2 cups all-purpose flour
    • 5 tablespoons all-purpose flour
    • 1 1/2 teaspoons baking powder
    • 1/2 teaspoon baking soda
    • 1 teaspoon salt
    • 12 oz (about 3 cups) fresh blueberries
    • 1 cup (2 sticks) unsalted butter, softened
    • 1 1/2 cups white sugar
    • 1 tablespoon sour cream
    • 2 teaspoons vanilla extract
    • 2 teaspoons lemon zest
    • 3 large eggs
    • 1/2 cup buttermilk
    Directions:
    1. Preheat oven to 350°F and line cupcake pan with paper liners
    2. Coat washed blueberries in the 5 tablespoons of flour in a medium bowl
    3. Sift together the 2 cups of flour, baking powder, baking soda, and salt in a large mixing bowl
    4. Cream butter and sugar together in the bowl of your mixer
    5. Mix in sour cream, vanilla extract, and lemon zest.
    6. Add in eggs, one at a time, mixing well after each addition.
    7. Add in flour mixture alternately with buttermilk, beginning and ending with the dry ingredients.
    8. Gently fold in blueberries
    9. Fill cupcake liners 3/4 full and bake for 22-25 minutes.

    Lemon Buttercream Frosting Recipe
    Ingredients:
    • 3/4 cup unsalted butter (1 1/2 sticks), softened
    • 5 cups powdered sugar
    • Freshly squeezed lemon juice from one lemon (about 1/4 cup)
    • 1/4 cup heavy cream
    • 2 tablespoons water
    • pinch of salt
    • 1 drop yellow food coloring (optional)
    Directions:
    1. Cream butter until light and fluffy in the bowl of your mixer
    2. Slowly add in powdered sugar until fully mixed
    3. Beat in heavy cream
    4. Add lemon juice and mix well
    5. Add water and salt and mix thoroughly
    6. Add food coloring
    7. Frost your cooled cupcakes!
    The end!

      Saturday, February 19, 2011

      Heart-Shaped Spritz Cookies

      My darling husband got me a fancy pants cookie press for my birthday. He did a lot of research, including seeing what Ms. Martha Stewart had to say, and got me the best cookie press ever. It's Italian. And I love it. The Europeans call it a "biscuit" press, which I also love. It's stainless steel and comes with a ton of plates to make various cookie shapes.


      He also got me a new paddle attachment for my KitchenAid mixer (also recommended by Ms. Stewart) which has little rubber scrapers on the sides. The paddle scrapes down mixes as it goes, which saves a lot of time since I don't have to stop and scrape it all down myself. I love it.

      I finally had a proper excuse to use my cookie press (not that I need an excuse to make cute cookies) for the Valentine's Day tea party we had a couple weeks ago. I used my heart-shaped plate to make these little cuties:


      The plate is a sort of "Y" shape that molds the dough into a heart. It took a little practice trying to get cookies that didn't just look like "Y"s or a big mushy mess.


      This may sound crazy but I thought the creamed butter and sugar looked so pretty.


      It gets so fluffy and lovely.


      Yeah, I think butter and sugar are pretty. I'm weird like that.

      I used Spritz cookie dough to make these guys. They were deeelicious. I'm excited about experimenting with different shapes, especially the floral shapes, and decorating them with icing and candies.


      Notice the flour everywhere? Yeah. I'm a messy baker. And I'm too stubborn to use the splash guard (which is sitting conveniently right next to the mixer, sigh).


      Spritz Cookie Recipe
      Ingredients:
      • 1 cup (two sticks) unsalted butter
      • 1/2 cup white granulated sugar
      • 1 large egg
      • 1 1/2 teaspoon vanilla extract
      • 2 1/4 cups all purpose flour
      • 1/4 teaspoon salt
      Directions:
      1. Preheat oven to 350°F.
      2. In the bowl of your mixer, beat butter until creamy
      3. Mix in sugar and beat until fluffy
      4. Add in the egg and vanilla extract and mix until fully incorporated
      5. Add in the salt and gradually add in the flour until fully incorporated
      6. Either press out the cookie dough in your cookie press, roll out the dough and cut out shapes, or drop cookie dough 1-2 inches apart.
      7. Bake 6-9 minutes
      Makes about 4 dozen cookies

      Thursday, February 10, 2011

      Creamy Chocolate Cake

      "Let's face it, a nice creamy chocolate cake does a lot for a lot of people; it does for me."
      Audrey Hepburn


      I'm weak in the knees for chocolate. Chocolate chip cookies. Chocolate truffles. Chocolate candy bars. Chocolate ganache. Hot chocolate. Chocolate brownies. Chocolate milkshakes. Chocolate ice cream. Chocolate gelato. Chocolate shavings. Those little crunchy chocolate bits in the middle of a Carvel ice cream cake. I'll take it anyway I can.

      But I don't think anything can beat a rich, creamy, chocolate cake with chocolate frosting. When I first lived on my own I would run to the grocery store to buy a slice of chocolate cake from the bakery whenever my craving would kick in. Now, being a little older and a littler wiser (and a far better baker than I once was), I can make my own cheaper version of chocolate cake. Cheaper, but just as delicious. AND, I get to have an entire cake instead of just one measly slice. Though, that may not really be a good thing. I do have my husband here to help me eat it, though. So, I'm only eating about 3/4 of it by myself :]


      I've made chocolate bundt cakes before, but somehow the chocolate cupcakes that I made for the little Valentine's Day tea party this past weekend were the first for me (at least the first from scratch). I'm now on a mission to test out different chocolate cake and chocolate frosting recipes and see which one most fulfills my chocolatey desires. I have hopes of a more rich, sweet chocolate cake with matching frosting- but I really liked the cupcakes I made this time around as well. The cake itself is made with cocoa powder which gives it a strong chocolate flavor. I was rushing around the morning of the party trying to make the frosting, and took my eyes off the melting chocolate too long as it started to burn. -Insert sad face here-. I was majorly bummed. But, then I had a stroke of genius (or desperation) which thankfully turned out pretty darn good. I used up the last bit of German chocolate I had (which wasn't much) then added a little punch of that same cocoa powder that I used in the cupcake batter. I added just enough to be noticeable, but overall left the frosting as a buttercream. Lucas dug it (he's always my tester) so the panic subsided and I stuffed my little frosting bag and went to town.


      The girls took leftovers home with them as well. I see that as a sign of success. Chocolate for the win!


      (Oh and you better believe that my quest for the perfect chocolate cake means that more recipes are coming your way soon!)


      Chocolate Cocoa Cake Recipe

      (makes about 16 cupcakes)

      Ingredients:
      • 1/2 cup and 1 teaspoon (for frosting) cocoa powder
      • 1 cup boiling water
      • 1 1/3 cup all purpose flour
      • 2 teaspoons baking powder
      • 1/2 teaspoon salt
      • 1/2 cup unsalted butter
      • 1 cup white granulated sugar
      • 2 large eggs
      • 2 teaspoons vanilla extract
      Directions:
      1. Preheat your oven to 375 degrees F and line your cupcake tray
      2. In a small bowl, pour the boiling water over the cocoa powder and mix thoroughly. Set aside to cool.
      3. In a medium bowl, mix together dry ingredients.
      4. In the bowl of your mixer (or in a large bowl if you don't have a mixer), beat together butter and sugar until fluffy.
      5. Add eggs, on at a time, mixing well after each addition.
      6. Mix in the vanilla extract
      7. Add in the dry ingredients and mix thoroughly.
      8. Add in all but one teaspoon (reserved for frosting) of the cocoa and mix well until smooth.
      9. Fill cupcake tray evenly (each cup about 3/4 full).
      10. Bake for 16-20 minutes, or until toothpick comes out clean.

      Frosting Ingredients:
      • 2 oz. German Chocolate (you could use unsweetened chocolate for a more dark chocolate taste)
      • 2/3 cup unsalted butter, room temperature
      • 1 1/4 cup powdered sugar
      • 1 teaspoon cocoa powder (reserved from cake batter)
      • 1 1/2 teaspoons vanilla extract
      Frosting Directions:
      1. Melt the German chocolate in a heatproof bowl over a saucepan of simmering water. Set aside to cool.
      2. Cream butter in your mixer
      3. Add powdered sugar to butter and mix until smooth.
      4. Add in cocoa mixture (reserved from cake batter) and mix well.
      5. Add in vanilla extract and mix well.
      6. Add in melted German Chocolate and mix until thoroughly combined with frosting.

      Thursday, January 27, 2011

      Random Baking Tips


       When I first started baking many years ago, I was a mess of a baker. Literally. I made a huge mess. Lucas would argue that I still am a mess (always getting flour and icing all over myself and the counter tops), but at least now my messes result in some delectable treats. Every cake I made during my rookie years would overflow in the oven and every cookie was burnt to a crisp. I was horrible at icing and even box mixes ended up in failure, let alone recipes from scratch. But, I've come a long way since then and after lots of practice and reading cook books and tips online as well as watching a ridiculous amount of baking shows, I've learned a lot about the science of baking. Not the scary kind of science. The fun, still room to be creative kind. Anyway, I thought I'd share a quick list of baking tips that I've learned throughout the years.


        1. Always use unsalted butter unless otherwise stated in the recipe when baking. Every stick of butter differs in how much salt it contains. If you use unsalted butter, you can control the amount of salt you use in a recipe.
        2. Unless otherwise noted, a recipe requiring eggs calls for large sized eggs.
        3. Unless otherwise noted, all baking ingredients should be room temperature
        4. Whenever I am baking a cake (especially bundt cakes), I always butter then flour the pan. This helps the cake to come out easily and also keeps the cake soft and not burnt on the outside.
        5. When making a pie crust, don't work the dough too much with your hands. The warmth from your hands will melt the butter in the crust. It's important that the butter stay cold until it starts to bake. The crust will become nice and flaky as the butter melts during the baking process.
        6. If a recipe calls for you to pre-bake the crust, use pie weights to keep the crust from shrinking down. You could also use dry beans.
        7. When baking cookies, start to babysit them after the minimum baking time. Take them out right when they start to get golden around the edges.
        8. When cookies and cupcakes are done baking, take them out immediately and let them cool on a wire cooling rack. If you leave them on the baking sheet/in the cupcake pan they will continue to bake.
        9. When making individual cake layers or bundt cakes, leave them to cool in the pan for about 20 minutes before removing them.
        10. When baking layered cakes, make sure the amount of batter is exactly equal in each layer. A kitchen scale can help to ensure equal amounts.
        11. A little bit of lemon juice or a pinch of salt can really help to bring out flavors.
        12. When using nuts in a recipe, toast them first to bring out the flavor more.
        13. When cutting a cake, use a serrated knife and wash it with cold water then wipe off clean between each stroke. This will help you to get nice, neat slices.
        14. When cutting a pie, cut two slices before pulling one out. For some reason it comes out easier this way.
        15. When you are using lemons, roll them with your hand on the cutting board before cutting into it. This releases the juices. 
        16. When alternating dry and wet ingredient additions to a batter, always start and end with the dry.
        17. When adding eggs, introduce one at a time and mix well before adding the next one.
        18. When creaming sugar and butter together, make sure they're thoroughly mixed together and fluffy before adding other ingredients.
        19. When you frost a cake or cupcake, use an offset spatula. It's easier and gives a smoother result than a knife or regular spatula.
        20. When making whipped cream, add a little honey to keep it from separating.
        21. Use an ice cream scoop to pour cupcake batter into the individual cups in the pan. This has made a world of difference for me. It helps to evenly divide the batter and to get nice clean cups.
        22. I don't always follow measurements exactly. With things that impact the taste of a dish (ie. chocolate, vanilla extract, honey, etc.), I will eyeball a tablespoon or teaspoon and sometimes add more if I think it would taste better with more of the ingredient. However, for dry ingredients I always follow the recipe to a T. The reason for this is that the amount of flour (and type of flour), baking soda, baking powder, or cornstarch you use greatly effects the outcome of your dish. If you don't follow the recipe, your dish may not rise, or it may rise too much or it may not thicken correctly. Also, it can impact the taste of the dish.


            Tuesday, January 25, 2011

            Yellow Cupcakes

            My husband's family has a huge gathering for Christmas each year at alternating houses. This year the gathering was at Pohickery Farm, which was really exciting since it was my first Walther family Christmas as an official Walther family member. My job, fittingly, was to make a few desserts. I had planned on doing all of my baking on Saturday (the day before the party), but unfortunately we had a bit of a family emergency to tend to (poor Lucas has an awful eye infection, but it's starting to heal!). So, Saturday night I was up until 2am, watching You've Got Mail ("don't cry, ShopGirl") while baking cupcakes and pie, then woke up early the next day to bake some more. Luckily, I have quite a guy (a real trooper) who volunteered to help me decorate the cupcakes even though he was under-the-weather. He's a great helper. If I were ever to be a contestant on Cupcake Wars, he'd definitely be my assistant.


            I decided to make a blueberry pie, red velvet cupcakes, and yellow cupcakes for the party. I've made yellow cupcakes before that were pretty rockin'. Unfortunately, I didn't save that recipe and had to find a similar one and then try to tweak it according to my memory. Lucas approved them and that's all I needed to know the recipe was a good one.


             My mother-in-law said that they taste like Berger Cookies and they really do thanks to the fudgey chocolate icing. Most of the pearl sprinkles on the cupcakes were added by Lucas while I tried to throw myself together in time for the party. I think he did a pretty fantastic job.


            Yellow Cupcake Recipe
            Ingredients:
            • 1 1/2 cups all purpose flour
            • 1 cup white sugar
            • 1 1/2 teaspoons baking powder
            • 1/2 teaspoon salt
            • 1/2 cup butter (1 stick), room temperature, cut into pieces
            • 1 large egg
            • 2 large egg yolks
            • 2 teaspoons vanilla extract
            • 1/2 cup sour cream
            Directions:
            1. Preheat oven to 350 degrees F and line cupcake tin with paper liners
            2. In an electric mixer beat to combine flour, sugar, baking soda, and salt.
            3. Add the butter to the dry mixture and mix well
            4. Add the egg and mix well
            5. Add the two egg yolks, mixing well after each addition (at this point the batter will be thick like cookie dough, but don't worry, it'll be more batter-like by the end!)
            6. Add vanilla extract and sour cream and mix well
            7. Evenly fill the cupcake tin and bake for 20-25 minutes or until inserted toothpick comes out clean

            ..................................................................................................................

            Chocolate Fudge Frosting Recipe:
             Ingredients:
            • 4 oz. unsweetened chocolate
            • 1 cup unsalted butter, room temperature
            • 1 1/3 cups powdered sugar
            • 1 1/2 teaspoon vanilla
            Directions:
            1. Melt chocolate in a double boiler over simmering water
            2. Set aside chocolate to cool
            3. Cream butter in the bowl of a mixer
            4. Add powdered sugar to butter and mix well
            5. Add vanilla to frosting and mix well
            6. Add in melted chocolate and beat until well blended and smooth

            Sunday, January 23, 2011

            It's Time

            I've been out of work for about a year now. I started off on medical leave for health issues that didn't allow me to return to work before my allotted time off was up. It's been an interesting journey trying to figure out, essentially, what I want to be when I grow up. I used to think I'd be a librarian, as I had worked in a library from the time I was 14 to the time I was 20 and loved every bit of it. Plus, I'm quiet so everyone thought I just "fit" in a library. But, I realized that wasn't what I was meant to do. Then, since I loved learning about medical issues and advances, I thought about nursing and soon successfully completed the Certified Nursing Assistant program. I said "goodbye" to the library and worked at the local hospital for the next three years while working through my pre-requisites for the nursing program. I was set on being a nurse. I felt passionate about it; I love medicine, I love the way the body works, and I love taking care of people and comforting them. But, at the end of my second year as a Nursing Assistant, I started experiencing health problems that made many day-to-day tasks difficult, especially those at my job. About a year later, I knew I just couldn't do it anymore. It wasn't safe for me or for the patients. So I took leave, got a great doctor, but still wasn't ready to come back weeks later. And I knew in my heart that I wouldn't ever go back. I knew it would be hard to tell others that I wasn't going to be a nurse anymore, but I knew that I wasn't. That I couldn't. And that the plan had changed. For the better.

            I've spent the last year at home, learning more about myself and my passions and skills. I won't pretend to know what our future holds, but I know where I'm meant to be in this moment. And I know that one day I will be a stay-at-home mother. I will take care of my home and make it a beautiful, loving place for my husband and children. I will use my hands and my skills to help my family in all the ways that I can. And right now, I'm beginning that journey. I know this is where my heart is and where I am meant to be. It may not sound practical and I know there are many out there that think it financially impossible, but it's not. I firmly believe this is my path, and that God will honor that. I always looked at the Proverbs 31 woman and thought "no woman can live up to that", but I tell you she can. It makes sense to me now. She is a woman who uses her hands to mend and make clothing for her family. She works out in the field to bring in food and profit for her family. She sells her works to bring profit to her family. She cares for her home and for her marriage. These are the things I hope to accomplish. I'm definitely not saying it's wrong for a woman to have a career. Different people are called to different roles in life. I believe I was meant to have my job in medicine to help me to better talk to and love people better and to prove to myself that I could do whatever I put my mind to. But, now I'm called down another road. And it's time to start this new season of my life. It's time to prepare for my future so that I can be able to stay home with our children. It's time to follow my dreams.


            That being said, it's time to make the jump. I've spent the past year planning and creating and deciding what I would use as part of my Sweet Pohickery business, but I've been too scared to stop planning and start doing. But, it's time. I'm taking the plunge. The Etsy shop I've had opened since August will finally be up and running this week. I feel like saying it here on the internet gives it power. THIS WEEK. There. Now I can't get out of it. Like I said, I've been battling some health issues that have made things difficult, but I'm ready to push myself. I'm starting with some easier things and will work my way up from there. I will be selling canned goodies, domestic goodies (dishcloths, aprons, etc.), prints, and maybe even some photographs. I'm really excited about all of these things, especially because I absolutely adore making them. Also, Lucas and I are accepting any requests for photography gigs with our company Martyr Media (contact: starr@martyrmedia.com) and I am looking forward to expanding the baking side of things as well (if anyone is interested in baked goods I can be contacted at sweetpohickery@gmail.com). Sweet Pohickery will also be present at craft and baking shows later this year. For some reason, people aren't really into craft and baking shows around here in the winter, I guess since they can't have them outdoors. But, I'm greatly looking forward to all of the post-snow shows. I'm in love with baking, but I need to start baking for other people so that I stop eating it all myself:] I'm working on getting more promotional materials together for Sweet Pohickery as well and will be incorporating some of that into my blog in the next few months.

            This blog entry was really scary to write. Things are happening! Big big things. But it's wonderful.

            Friday, December 24, 2010

            Snickerdoodles!

            Hands down, my favorite cookies are snickerdoodles. I used to long for that time of year when my mother's co-worker would send home homemade snickerdoodles with her. And now I can make my own and OH what a pleasure that is. But, I still try to reserve them for Christmas season. It makes them more special.

            I waited, as usual, until the last minute to do my holiday baking so our table is covered in snickerdoodles and white chocolate chip oatmeal cranberry cookies right now. Luckily I'm too busy to be tempted to just sit and eat them.
            .


            Snickerdoodles are soft, chewy, delicious, and smell amazing as they bake.


            And of course, they're pretty :]


            Snickerdoodle Cookies
            Ingredients:
            • 2 3/4 cups all purpose flour
            • 1/2 teaspoon salt
            • 2 teaspoons baking powder
            • 1 cup (two sticks) unsalted butter, softened
            • 1 1/2 cups white sugar
            • 2 large eggs
            • 1 teaspoon vanilla extract
            Cookie coating ingredients:
            • 1/3 cup white sugar
            • 2 teaspoons ground cinnamon
            Directions:
            1. Preheat oven to 400 degrees F
            2. Line baking sheets with parchment paper or coat with nonstick spray
            3. In a large bowl, whisk together flour, baking powder, and salt
            4. Cream together butter and sugar
            5. Add eggs to butter mixture, mixing well after each addition
            6. Add in vanilla extract
            7. Add in dry ingredients and mix well until smooth dough is formed
            8. In a medium mixing bowl, mix together coating ingredients
            9. Form dough into 1 inch round balls and roll to cover in coating mixture
            10. Place dough balls 2 inches apart on baking sheets
            11. Use the bottom of a glass to gently press balls of dough down to 1/2" thickness
            12. Bake cookies for 8-10 minutes or until slightly golden around the edges

            Friday, December 17, 2010

            Peppermint Bark

            Christmas time is the best inspiration for baking. I love that there are so many treats that are specific to Christmas and are rarely seen any other time of year.

            On Saturday I made Christmas cookies with the girls. On Wednesday I made peppermint bark with my friend from church, Rachel. It's really easy to make. And really wonderful to eat. It was oh so tempting to eat it all up right away.

            I always make Lucas wait to eat things until I go through a gazillion pictures, trying to get the right angle. Poor guy.


            You can make peppermint bark with white chocolate or both white chocolate and milk chocolate. You could make it with just milk chocolate as well, if you're not a white chocolate fan.

            I used my little pan for my little freezer. But, for all y'all normal folk, here is the original recipe...

            Peppermint Bark Recipe
            Ingredients:
            • 6 oz. semi-sweet chocolate (170 g) in squares or coarsely chopped
            • 2 teaspoons vegetable oil
            • 6 oz. white chocolate (170g) in squares or coarsely chopped
            • 1/3-1/2 cup crushed candy canes or starlight mints (to crush them, simply place them in a Ziploc bag and go to town on them with a rolling pin)
            Directions:
            1. Line a 8x8" baking pan with parchment paper
            2. Make a double boiler by placing a heatproof mixing bowl over a saucepan of simmering water
            3. Melt semi-sweet chocolate and one teaspoon of vegetable oil in bowl over saucepan
            4. Pour melted chocolate into baking pan and tilt pan to spread the chocolate evenly along the bottom
            5. Refrigerate for 30 minutes, or until chocolate has set
            6. Melt white chocolate and remaining one teaspoon of vegetable oil in heatproof bowl over saucepan
            7. Pour white chocolate over the chilled dark chocolate and spread evenly
            8. Sprinkle peppermint candy evenly over white chocolate
            9. Refrigerate for 30 minutes, or until white chocolate has set
            10. Remove the bark from the pan by gently lifting up the parchment paper.
            11. Peel back the paper and break the bark apart with your hands into different pieces
            12. Store in an airtight container in refrigerator for up to two weeks
            This recipe makes about 25 delicious pieces of bark.

            Monday, December 13, 2010

            Christmas Tea Party

            A couple of us ladies have been trying to have monthly tea parties. It's nice to have a little girl time fix. Especially when it involves tea and treats. Since I'm crazy in love with Christmas, I really wanted to host the Christmas tea party. We had all kinds of peppermint in the form of peppermint brownies (thank you Laurie, thank you thank you), peppermint tea, starlight mints, and peppermint sticks for tea and hot chocolate. We snacked and decorated cookies as we watched Love Actually.


            I really wish I would have gotten more pictures, but we got into the habit of decorating our cookies then immediately eating them. Lucas was disappointed and confused when he found out that instead of decorating them and eating them later, we decorated them for the sole purpose of eating them right away, leaving him none. Don't feel sorry for him though; Laurie left her delicious brownies behind.


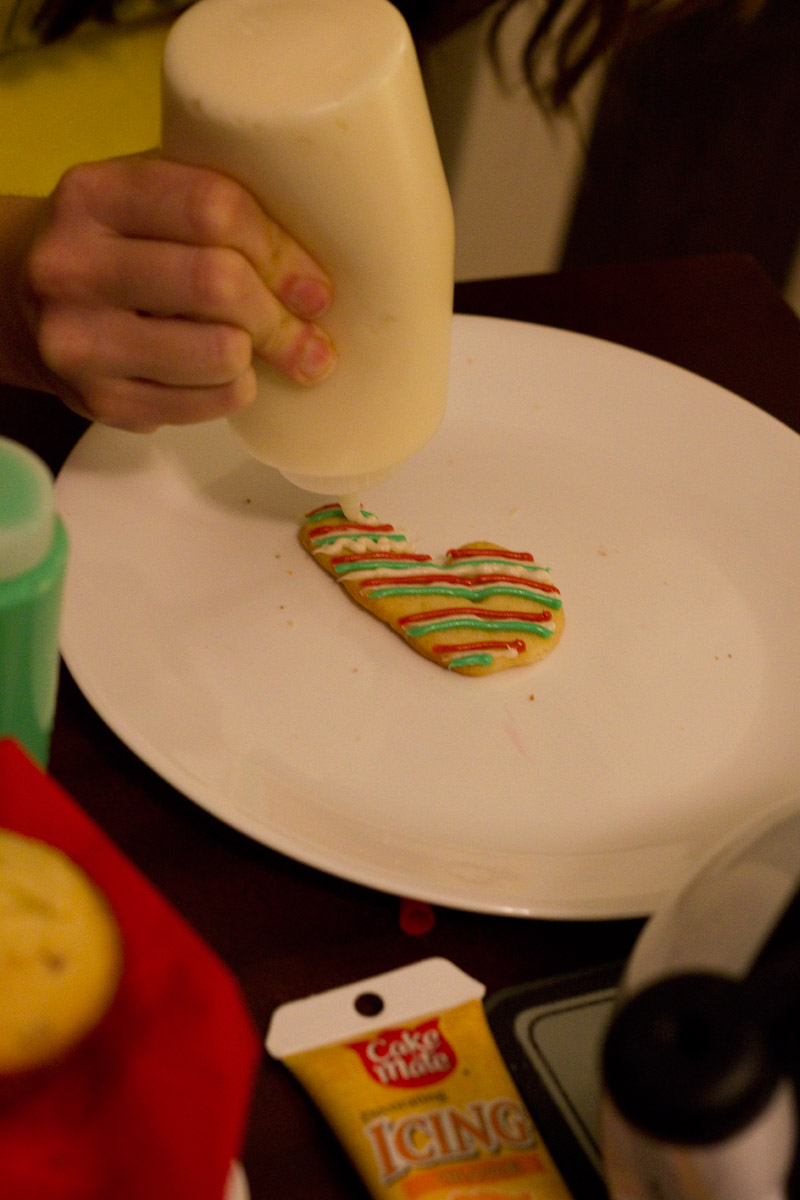
             We made cookies that resembled our men. I think that was the most fun part. My cookie version of Lucas looked like the hardcore kid version of Santa Claus. Laurie's cookie version of her boyfriend had a smear of brownie for hair and zebra striped shoes (which were supposed to be Adidas). Melissa's cookie looked just like her husband. Especially with his fancy green sprinkle pants. It was awesome. And we laughed a lot. Which is wonderful. I love to laugh.


            My friends are super cute.

            Wednesday, December 1, 2010

            German Chocolate Cake

            My mother's birthday was yesterday and I took on the challenge of baking her favorite cake- German Chocolate. It's the most involved cake I have made so far. But, it was fun. And I got a nice work out whipping the egg whites by hand. Next time I'll have to bring out the hand mixer. There are a few little random baking/cleaning tasks that make me feel super domestic; for some reason whipping egg whites is one of them. It made me feel like a little homemaker and like I should have had a child on my hip while gabbing on the phone to a girlfriend. Anyway, the hard work paid off. I think it turned out rather nicely.


            It was a tad bit sloppy as I was inpatient and didn't wait long enough to put the frosting on. The frosting was still warm and started sliding off, but, I kinda like the messy look. It gives it that "I was made from home with love" look.

            I used the recipe that came with the box of Baker's German Chocolate. I actually found the same recipe online and it got a gazillion positive reviews so it seemed like the way to go. I did tweak it slightly. I added more chocolate to the cake (I can't help it, I like everything super sweet), used cake flour instead of all purpose, and poured chocolate ganache over top of the cake before adding the frosting.


            German Chocolate Cake Recipe
            Cake Ingredients:
            • 1 pkg. (4 oz.) sweet German chocolate  [I used 1 and a half packages]
            • 1/2 cup water
            • 2 1/2 cups cake flour  [2 cups if you're using all purpose]
            • 1 teaspoon baking soda
            • 1/2 teaspoon salt
            • 1 cup (2 sticks) butter, softened
            • 2 cups sugar
            • 4 eggs, seperated
            • 1 teaspoon vanilla
            • 1 cup buttermilk
            Frosting Ingredients:
            • 4 egg yolks
            • 1 can (12 oz) evaporated milk
            • 1 1/2 teaspoon vanilla
            • 1/2 cup (1 stick) butter, softened
            • 1 package (7 oz.) coconut flakes
            • 1 1/2 cups chopped pecans
            Cake Directions:
            1. Preheat oven to 350 degrees F. Cover bottoms of 3 (9 in) round cake pans with wax paper and grease sides of pans. [I only did two layers and used the leftover batter for cupcakes]
            2. Melt chocolate in water in a saucepan on medium heat until chocolate is almost fully melted. Turn off heat and stir chocolate until completely melted.
            3. Mix flour, baking soda, and salt together in a medium mixing bowl and set aside.
            4. Beat butter and sugar together with electric mixer until light and fluffy.
            5. Add egg yolks, one at a time, beating well after each addition.
            6. Blend in melted chocolate and vanilla
            7. Add flour mixture alternately with the buttermilk, mixing well after each addition.
            8. Beat egg whites in a small bowl until stiff peaks form then gently fold whites into batter
            9. Pour batter evenly into prepared pans
            10. Bake 20-30 minutes or until a toothpick comes out clean
            11. Immediately run a small metal spatula or knife around cake layers
            12. Cool in pans 15 minutes, then remove layers from pans, discarding wax paper
            13. Once layers are completely cooled, apply coconut-pecan frosting between layers
            14. (Optional- pour chocolate ganache over top layer. To make ganache, make a double boiler and melt 4-8 squares of German chocolate then add in 1-2 tablespoons whipping cream or half and half and mix well)
            15. Spread coconut-pecan frosting generously over top layer of cake
            Coconut-Pecan Frosting Directions:
            1. Beat egg yolks, milk, and vanilla in a large saucepan with a whisk until well blended.
            2. Add sugar and butter to saucepan and cook on medium heat, stirring constantly, for about 12 minutes (until thick and golden brown).
            3. Remove saucepan from heat. Lightly toast coconut and pecans on baking sheet
            4. Add coconut and pecans to saucepan and mix well.
            5. Allow frosting to cool before applying to cake

            Thursday, November 25, 2010

            Thanks

            Our first married Thanksgiving was lovely. It started with Lucas watching me jump up and down with joy as the Macy's Thanksgiving Day Parade began. We headed out to my parent's house shortly after where I had my father's famous breakfast (which I look forward to all year long- SO GOOD) and spent time with my amazing family (minus one brother who is sadly in Ohio- miss you, bro). We ended our Thanksgiving with a dinner with my in-laws and A Charlie Brown Thanksgiving. And a slice of apple pie with homemade whip cream. Happily stuffed.

            Now it's time to clean up the mess I made yesterday while making four, yes, four pies.


            See what a mess I was? Hair all askew and flour covering my entire apron. Scrappy was finding all kinds of pie dough to lick off of my pants. But totally worth it.


            Pretty, right? It helps that we also have a new lens, our nifty fifty (50mm), which produces some pretty rad pictures. I like the low lighting and how the kitchen looks sort of industrial.


            Anyway. . .

            Happy Thanksgiving
            I hope yours was as wonderful as mine.


            Friday, November 12, 2010

            White Chocolate Chip, Oatmeal and Cranberry Cookies

            My mother-in-law made these cookies last Christmas. While over their house one night, Lucas made about five trips down to the kitchen to get some more. So, as you can see, he really enjoys them. Around the beginning of our marriage, a few months later, I started craving them and decided to make them myself. I'm admittedly not a very good cookie maker. I get distracted in the short baking time they take and they often get burnt as a result. But, I've found it very hard to screw up these cookies. They're so chewy and soft, even when I let them bake for a little too long. And I feel semi-healthy when I eat them since they have fruit and oats in them. It's like the theory my friend Stacey and I created about balancing out an unhealthy meal of ice cream with an apple. Lucas doesn't agree with my theories. But I still stand by them.


            Oatmeal Cookies with White Chocolate Chips and Cranberries
            Ingredients:
            • 1 1/2 cups flour
            • 1 teaspoon baking soda
            • 1/2 teaspoon salt
            • 1/2 teaspoon ground cinnamon
            • 2 1/2 cups quick cooking oats
            • 1 cup (2 sticks) of unsalted butter, slightly softened
            • 2 large eggs beaten lightly
            • 1 cup packed light brown sugar
            • 1 tablespoon honey
            • 2 teaspoons vanilla extract
            • 1 1/3 cups dried cranberries
            • 1 1/2 cup white chocolate chips
            Directions:
            1. Preheat oven to 350 degrees F
            2. Spray baking sheet or line with parchment paper
            3. In a medium bowl, mix together dry ingredients
            4. Mix together butter and sugar in separate bowl until light and fluffy
            5. Add eggs and mix well
            6. Add honey and vanilla and mix until fully blended
            7. Add dry ingredients to wet mixture in two additions, mixing well after each addition
            8. Fold in white chocolate chips and cranberries
            9. Drop tablespoon servings of dough onto baking sheet, 2 inches apart
            10. Bake 9-11 minutes

            Sunday, October 24, 2010

            Pumpkin Spice Cake

            I forgot how much I love bundt cakes. I'm stoked that this recipe only used up half of my can of pumpkin, so I can use the rest on something else. Like pumpkin ginger pancakes. Hurray for fall treats!


            Pumpkin Spice Cake
            Ingredients:
            • 1/2 cup (1 stick) melted unsalted butter
            • 1 tablespoon butter for pan
            • 2 1/2 cups all purpose flour
            • 2 teaspoons baking powder
            • 1/2 teaspoon salt
            • 1 tablespoon pumpkin-pie spice
            • 2 large eggs
            • 1 1/2 cups sugar
            • 15 oz pumpkin puree (make sure you get pure pumpkin and not pumpkin pie filling)
            Directions:
            1. Preheat oven to 350 degrees F
            2. Spread tablespoon of butter all over pan then coat with a thin layer of flour
            3. In a medium bowl, sift together flour, baking powder, salt, and pumpkin-pie spice
            4. In a mixing bowl, mix together melted butter, sugar, eggs, and pumpkin puree
            5. Slowly add dry ingredients to wet mixture
            6. After full combined, pour batter into prepared pan
            7. Bake for 45-50 minutes
            I had butter cream frosting left over that I had made about a week ago that I added 3 tablespoons of honey to, melted slightly, then poured over the warm cake after I turned it out of the pan. YUM.

            Monday, October 11, 2010

            Red Velvet

            This is easily my favorite cake. I love the hint of chocolate masked by the red coloring. It's so yummy and classic.


            Red Velvet Cupcakes Recipe
            Ingredients:
            • 2 1/2 cups cake flour (or all purpose flour)
            • 1 1/2 cups granulated white sugar
            • 1 teaspoon baking powder
            • 1 teaspoon salt
            • 2 teaspoons cocoa powder
            • 1 cup vegetable oil
            • 1 cup buttermilk
            • 2 large eggs
            • 2 tablespoons red food coloring (if you're using the gel coloring, about 1/2 tsp works)
            • 1 teaspoon white distilled vinegar
            • 3 teaspoons vanilla extract
            Directions:
            1. Preheat oven to 350 degrees F
            2. Line two 12 cup cupcake pans
            3. Sift together dry ingredients in a medium bowl
            4. With a hand mixer or electric mixer blend together eggs, buttermilk, vegetable oil, vanilla, vinegar, and food coloring (if you're using gel coloring, mix it in after the dry ingredients are added)
            5. Add sifted dry ingredients into the wet mixture and mix until thoroughly combined
            6. Divide mixture among cupcake tins, filling each cup about 2/3
            7. Bake for 20-22 minutes

            Monday, September 27, 2010

            Cornbread

            Remember that chicken corn chili I posted about a few weeks ago? I've been daydreaming about the cornbread that accompanied it. Sweet, soft, yummy cornbread.

            So I decided to feed my craving and make some more for dinner this week. Since today is a gross, gloomy, rainy sort of day we decided to have chili again as well.


            I love the color too; all bright and yellow. They're really cute when you make them into muffins.


            Buttermilk Cornbread Recipe
            Ingredients:
            • 1/2 cup unsalted butter (1 stick)
            • 2/3 cup white sugar
            • 2 eggs
            • 1 cup buttermilk
            • 1/2 teaspoon baking soda
            • 1 cup cornmeal
            • 1 cup all purpose flour
            • 1/2 teaspoon salt
            Directions:
            1. Preheat oven to 375 degrees F
            2. Spray baking pan (I use a 7x11; you could use an 8 in square pan or a cupcake pan)
            3. Melt butter and allow to cool slightly (if you leave the butter hot it can scramble your eggs)
            4. Mix together melted butter and sugar
            5. Beat in eggs one at a time, mixing well after each
            6. Combine buttermilk and baking soda then mix into butter/sugar/egg mixture.
            7. Mix in flour, cornmeal, and salt until well blended without any lumps
            8. Pour batter into prepared pan
            9. Bake for 30-40 minutes

            Friday, September 17, 2010

            Tea Party

            For my friend Laurie's birthday, we had a lovely little tea party. We sipped tea out of little china tea cups and ate some delicious treats that were all set on a lovely old linen tablecloth. It felt fancy and we all agreed that the tea tasted better out of those little tea cups.


            I saw a recipe a few months ago for a triple layered pink lemonade cake and had been searching for a reason to make it ever since- the tea party seemed like the perfect occasion. I decided to make cupcakes instead of a layered cake, partly because our tiny little oven wouldn't allow me to bake more than one layer at a time, and partly because I liked the idea of the girls being able to just pick up their own individual serving in the form of a cute little cupcake.


            They were the smoothest, moistest, prettiest cupcakes I ever made. They had a nice pink tint to them and were topped with an equally delicious lemon buttercream.


            I highly recommend you make them too :]

            Here is the original Pink Lemonade Cake recipe. You can simply cut the recipe in half to make them into cupcakes (makes 12). You could also leave the recipe as is and make 24 yummy cupcakes!


            Also, I didn't use the buttercream from the original recipe, but made this version instead:

            Lemon Buttercream Recipe

            Ingredients:
            • 1/2 cup softened butter (1 stick) 
            • 1/4 cup Crisco/vegetable shortening
            •  2 cups confectioners' sugar
            • 3 teaspoons lemon extract
            • 1 teaspoon vanilla extract
            Directions: 
            1. With a mixer, cream butter and Crisco together.
            2. Gradually add in confectioners' sugar until fully incorporated.
            3. Mix in vanilla and lemon extract.

            Tuesday, August 31, 2010

            Tips Cooks Love

            My awesome friend, Camille, gifted me an awesome book called Tips Cooks Love: Over 500 Tips, Techniques, and Shortcuts That Will Make You a Better Cook!


            It's pretty much the encyclopedia of cooking in a neat little package. This little book is jam-packed with amazing tips and explanations for all things cooking and baking from cookies to grilling to pressure cooking. I've learned the chemistry of baking soda and baking powder, the difference in heat conduction between a ceramic and glass pie pan, the way to make a perfect fudge brownie, and the best way to make a nice and juicy hamburger.

            I once tried to convince Lucas that baking could be fascinating to him because it's scientific. He just laughed at me. This book however provides the proof that baking is scientific! In cooking you can throw a dash of this and a dash of that (which admittedly, I find to be the fun part), but with baking you must accurately follow the recipe. The amount of baking powder or soda you use impacts the way your baked goods rise and how much air is incorporated. The difference between cold butter and warm butter impacts how flaky your pie crust will be. How long and at what heat level you cook corn starch impacts the thickness of your pie filling. I love learning more about the things I love.


            You can get your own copy of this book on Amazon.com!

            Tuesday, August 24, 2010

            Cold Weather and a Warm Oven

            It's down to 69 degrees outside and it's absolutely delightful. Fall is coming and my excitement is building. It's my absolute favorite season. I can't wait until it's officially time for red and yellow leaves, cool breezes, tights, scarves, sweaters, and hot apple cider.

            To celebrate this lovely, chilly, breezy day I baked a yummy fall-like treat- cinnamon and nutmeg spice cupcakes with maple butter cream frosting. They were so delicious and the smell of cinnamon and nutmeg filling my home was an added bonus.


            Hello, fall weather. Please feel free to stick around.


            Cinnamon Nutmeg Spice Cupcakes

            Ingredients:
            3 eggs
            1/2 cup unsalted butter, softened
            1 1/2 cup sugar
            1 cup buttermilk (if you do not have buttermilk, pour 1 tbsp white vinegar into a measuring cup then fill with milk until 1 cup is reached)
            2 teaspoons vanilla extract
            2 cups flour
            1 teaspoon baking powder
            1 teaspoon baking soda
            1/2 teaspoon nutmeg
            1 1/2 teaspoon cinnamon
            1/4 teaspoon salt

            Preheat oven to 350 degrees.  Line cupcake pan with liners.

            Cream the butter and sugar together. Add in the eggs and mix well after each until combined. Add vanilla to mixture. Mix together the flour, baking powder, baking soda, salt, and spices in a separate bowl. Add the flour mixture and the buttermilk alternately in three parts. Fill cupcake tins 2/3 full.

            Bake at 350 degrees for about 17-18 minutes or until a toothpick comes out clean.


            Maple Butter Cream Frosting

            Ingredients:
            1 cup unsalted butter, softened
            2 3/4 cups powdered sugar
            2 tablespoons brown sugar
            3 tablespoons maple syrup
            1/4 teaspoon vanilla extract
            1/4 teaspoon salt

            Directions:
            Cream butter in bowl. Mix in powdered sugar and beat for about a minute, scraping sides of bowl as needed. Add the brown sugar and maple syrup.  Mix for 2-3 minutes until frosting is well mixed and fluffy.


            (NOTE: If you use salted butter for the cupcake and frosting, do not add the 1/4 teaspoon of salt. I use unsalted butter when I cook/bake so that I can control the amount of salt I put in)